How to add categories to your eTags
Categories are added to eTags under Locations.
- Log into your back office and navigate to Company -> Locations.
- Click on the relevant location to see more details.
- You will see several tabs: Form, Blocked items, Blocked variations. If you have eTags you will have more tabs, e.g. Outside, Bar, or Showroom. These are your "Zones" with varying eTags. Click on the relevant zone to see it's eTags.

- You can edit individual eTags or multiple at once. Next to each eTag you will see three icons;
 Add eTag,
  Modify eTag, and
  Edit eTag.
- To edit an individual eTag, click on the modify eTag icon next to the relevant eTag
- A window will appear with the assigned eTags. There should only be one option, click on it and a window will appear where you can change the settings of this particular eTag
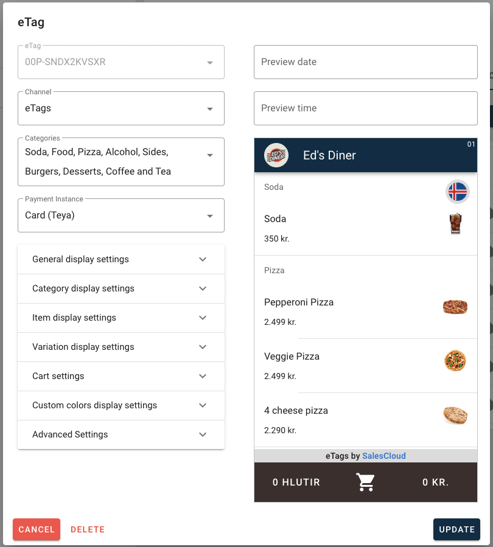
- Click on the Categories field and either check or uncheck categories depending on whether you can't them visible or not in the eTag.
- To edit multiple eTags, check the box next to each eTag you wish to edit or the top check box to choose them all. Then click the
 Edit multiple icon.
- A window will appear with the assigned eTags. There should only be one option, click on it and a window will appear where you can change the settings of this particular eTag
- Click on the Categories field and either check or uncheck categories depending on whether you can't them visible or not in the eTag.
- Once all of the categories you want on the tags are selected, you can click "Update" (if modifying a single eTag or "Update selected" if modifying multiple eTags).